Symptom: ArcaOS EPC TIM is stuck in the Cassini 16 Infrastructure after pulling the latch release tab.
Root Cause: Failing plastic release pin mover mechanism in the RI8574 EPC TIM.
Solution: Contact [email protected] and request an RMA, including the EPC Serial Number and Tester Serial Number. Follow the steps below "To Manually Release the EPC TIM".
Background: The RI8574 EPC TIM uses the same case and mounting equipment as the other TIMs so the accessories are described as the Top Latch which secure the TIM to the Infrastructure's Test Head and the Bottom Latch that prevents the TIM from falling to the ground while being removed. Pulling the Bottom Latch release will free the TIM and allow it to be removed. The EPC TIM is oriented upside down so that the Bottom Latch is actually oriented near the top of the Infrastructure. The blue 3-D printed release mechanism can wear and fail in a way that requires the Bottom Latch Cover to be removed and a screwdriver used to manually release the TIM. The original piece was 3-D printed plastic that can become brittle with age and was replaced by a black anodized aluminum material. The orientation of the EPC TIM latch also applies more force to the plastic piece, making it more susceptible to failure while inserting and removing the TIM. RI has been replacing this piece when the EPC TIM is returned for repair since 05 2022.
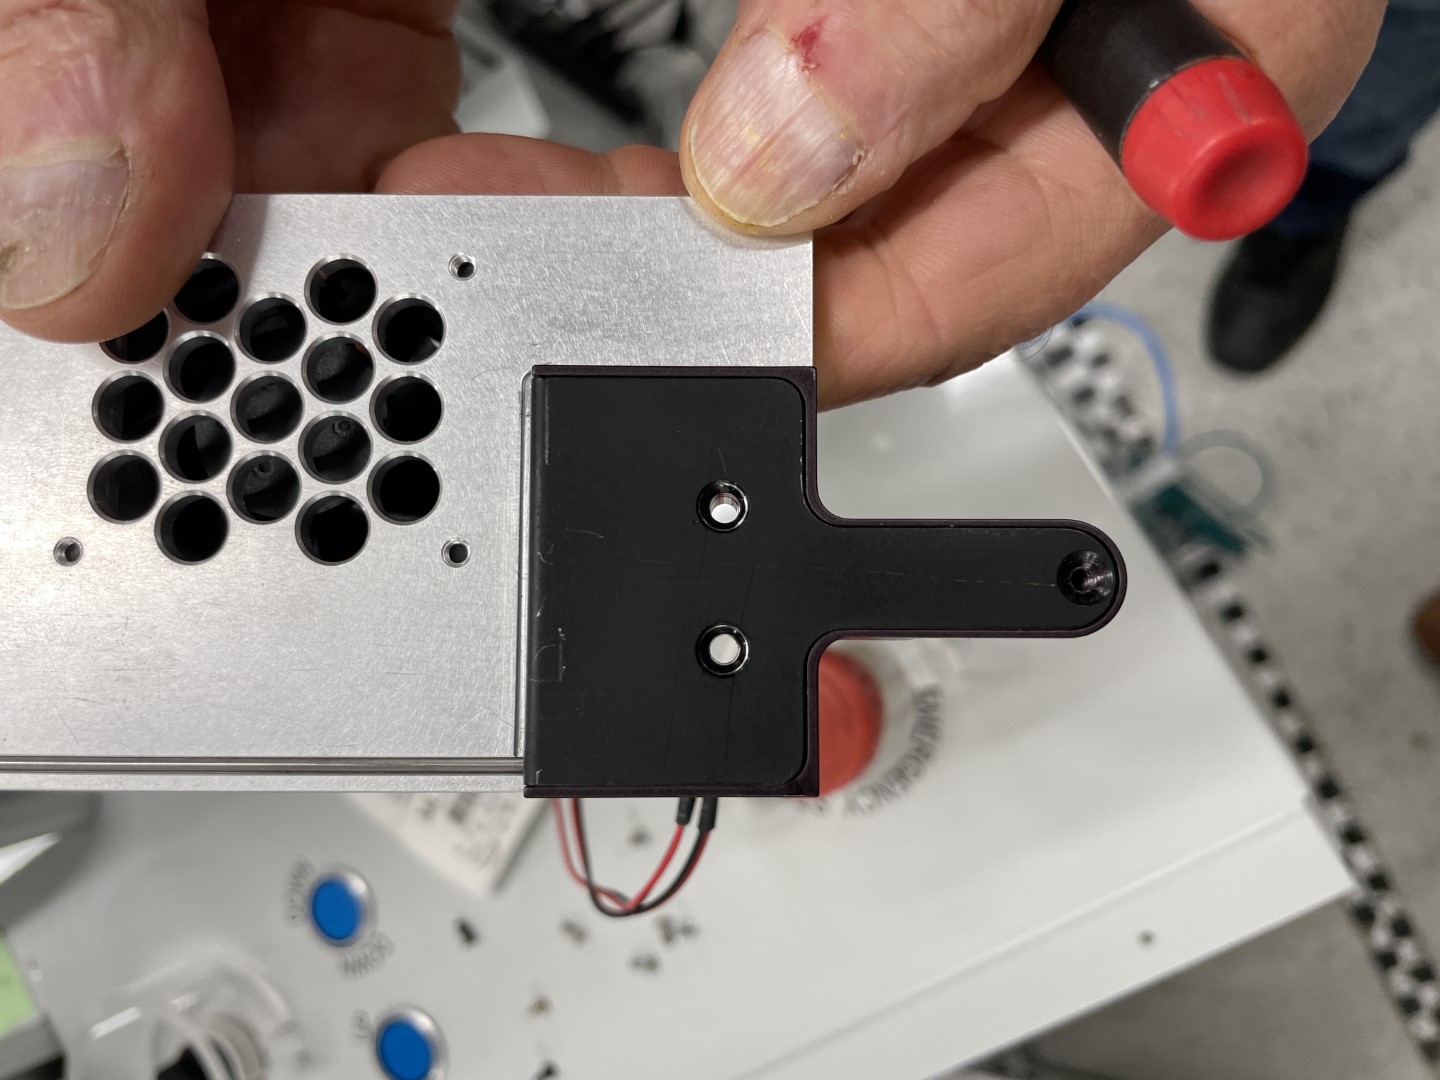
Identify Affected EPC TIM: Affected TIMs can be identified by inspecting the Bottom Latch Lock. Affected TIMs have a blue 3D printed plastic material and unaffected TIMs have a black anodized aluminum material as seen in Figure A.
Figure A: (Bad) Blue Latch on Left, (Good) Black Latch on Right

Repaired Serial Numbers: RIVK7GL0, RIVF3KH0, RIPW8FE0, RIP65YE0, MNMVFG1A, RIVK7GL0, RIPHMV40, MMLYW41A, RIP0HAF0, RVVB710A, RIUCLFW0, RIM5GFB0
Tools Needed:
- #1 Philips Screwdriver
- M4 Allen Wrench for AUX mount plate (Optional)
- 2 People needed to remove the TIM in step 8.
To Manually Release the EPC TIM:
- Shutdown the EPC and switch the MAIN side breaker to OFF position.
- Remove Tester Front Cover by unscrewing the 6 Philips Head Screws around the top and side edges of the cover. Optionally, remove the AUX Mount Plate with Allen wrench.
- Slide the Infrastructure Front Panel cover horizontally away from the main vertical extrusion until it is free by pressing firmly on the front and pushing outward as seen in View A and the zoomed View A diagrams in Figure 1.
- Locate the EPC Bottom Latch behind the power supply and remove the Bottom Latch Cover by unscrewing the cover that is on the Bottom Latch to access the pin mover mechanism. Carefully remove the indicated screw in Figure 2.
- Reposition the screwdriver to the other side of the wall and unscrew the two long screws as shown in Figure 3.
- After removing the 3 screws, remove the cover exposing the pin mover mechanism.
- Position your screwdriver as shown in the notch and carefully apply pressure to the screwdriver to push the Pin Mover Mechanism as shown in Figure 5. This will release the pins holding the EPC Bottom Latch in place.
- While the pins are released by one person in the step above, the second person removes the EPC by lifting up and out of the slot, as normal shown in Figure 6.
- After removing the TIM, please reattach the Bottom Latch Cover (see Figure 7) and tighten the screws removed in steps 4 and 5.
- Slide the Infrastructure Front Panel into position and tighten the 6 Phillips screws around the perimeter starting in the upper right corner, then bottom right corner. Final alignment can be tricky and require some adjustment of the screws. Tighten all screws and attach the optional AUX Mount Plate (if needed).
- The Infrastructure is ready for a replacement RI8574 EPC TIM.
Figure 1: Front Panel
Figure 2: 1st Bottom Latch Screw
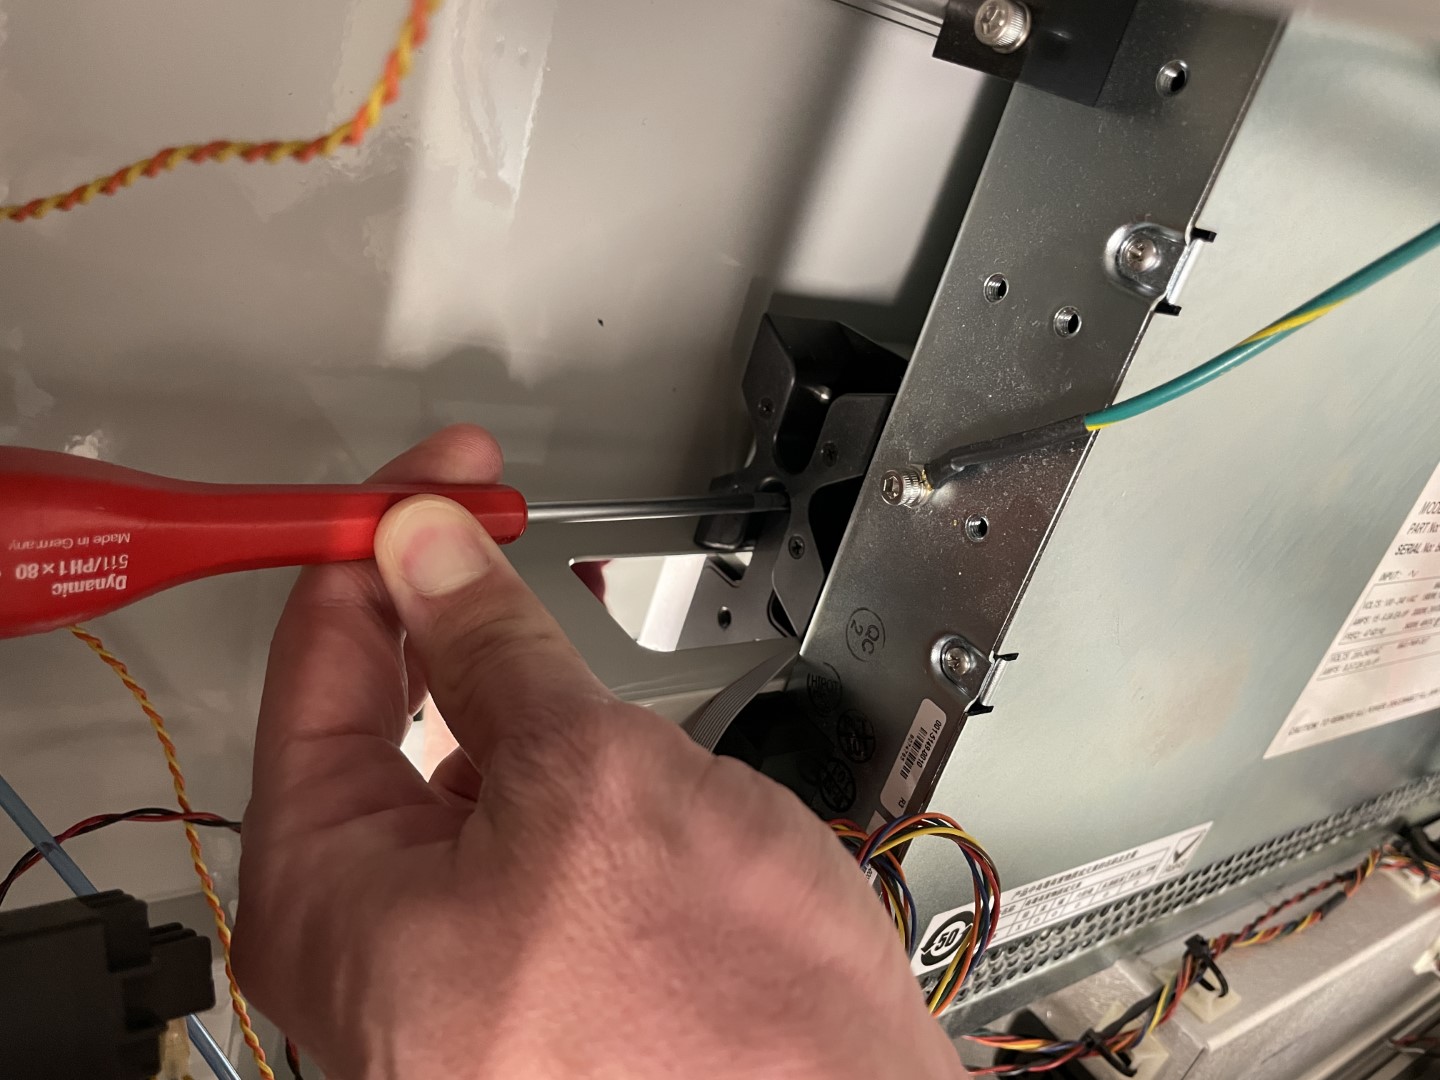
Figure 3: Bottom Latch Screws #2 & #3
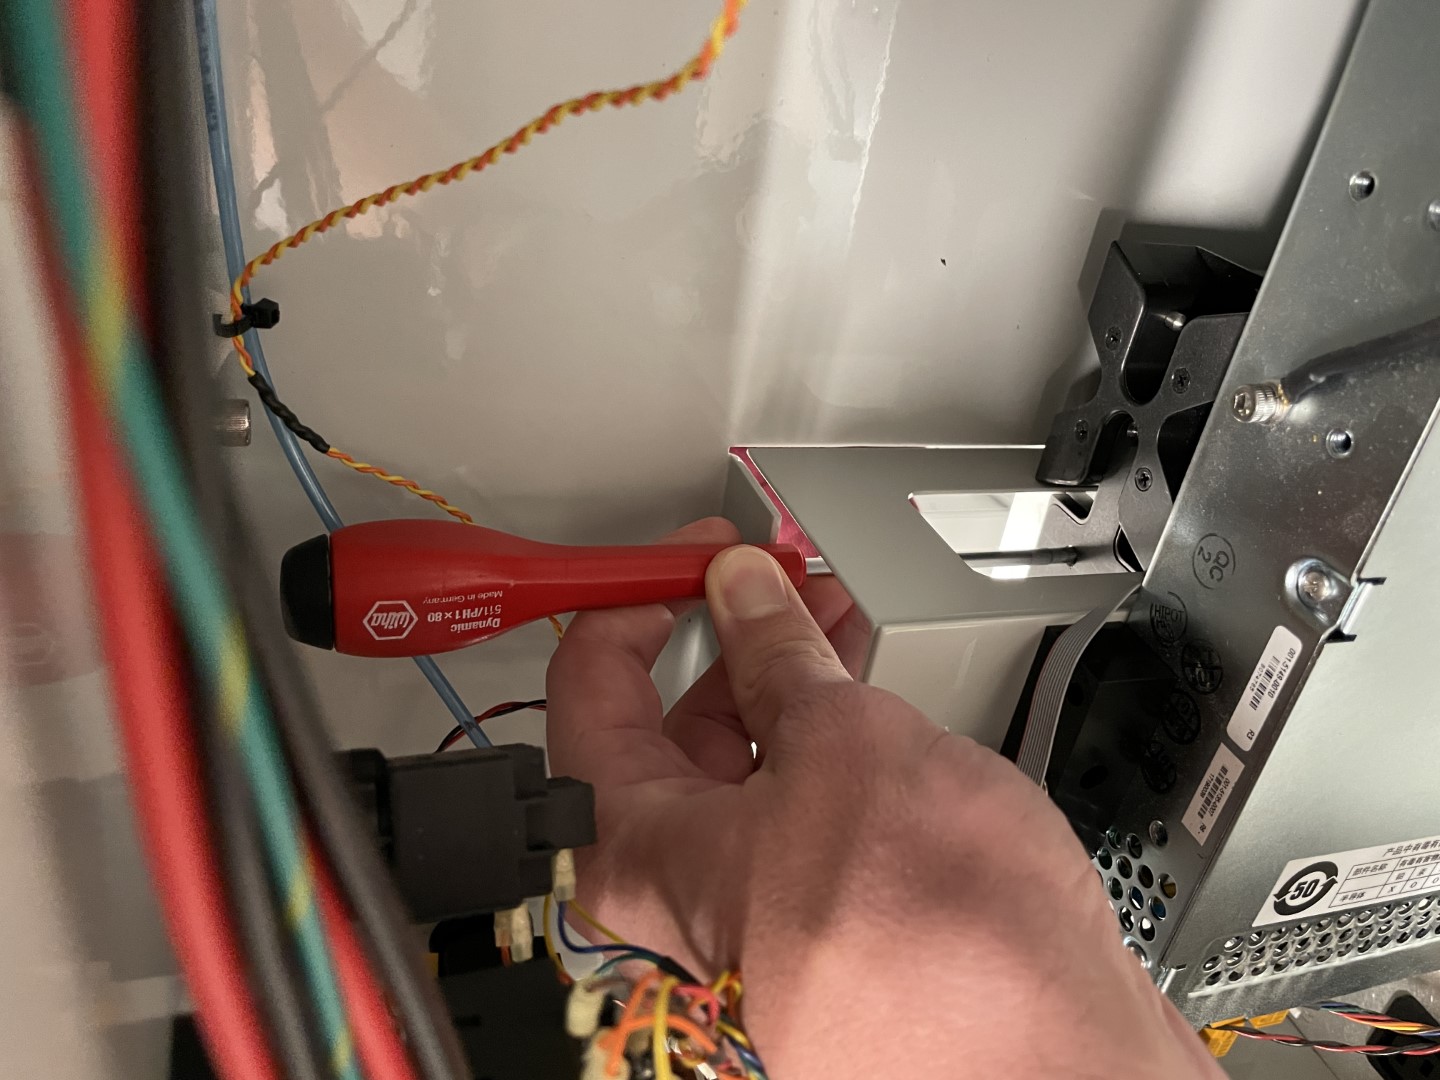
Figure 4: Bottom Latch Cover Removed

Figure 5: Pushing Release Mechanism
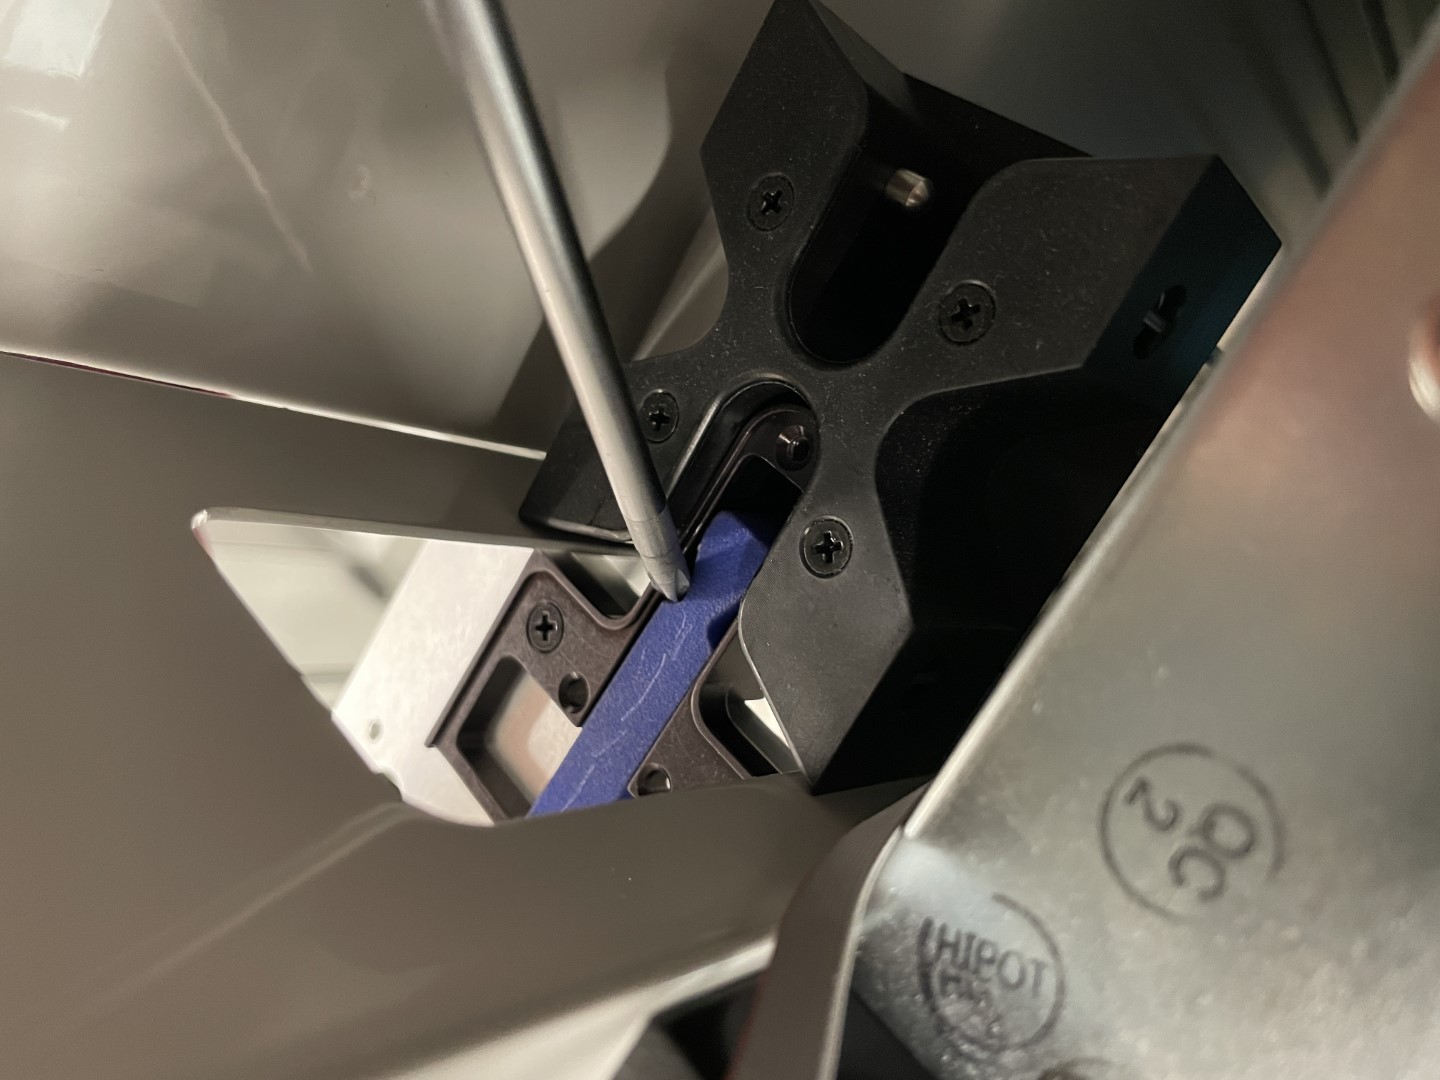
Figure 6: EPC TIM Released
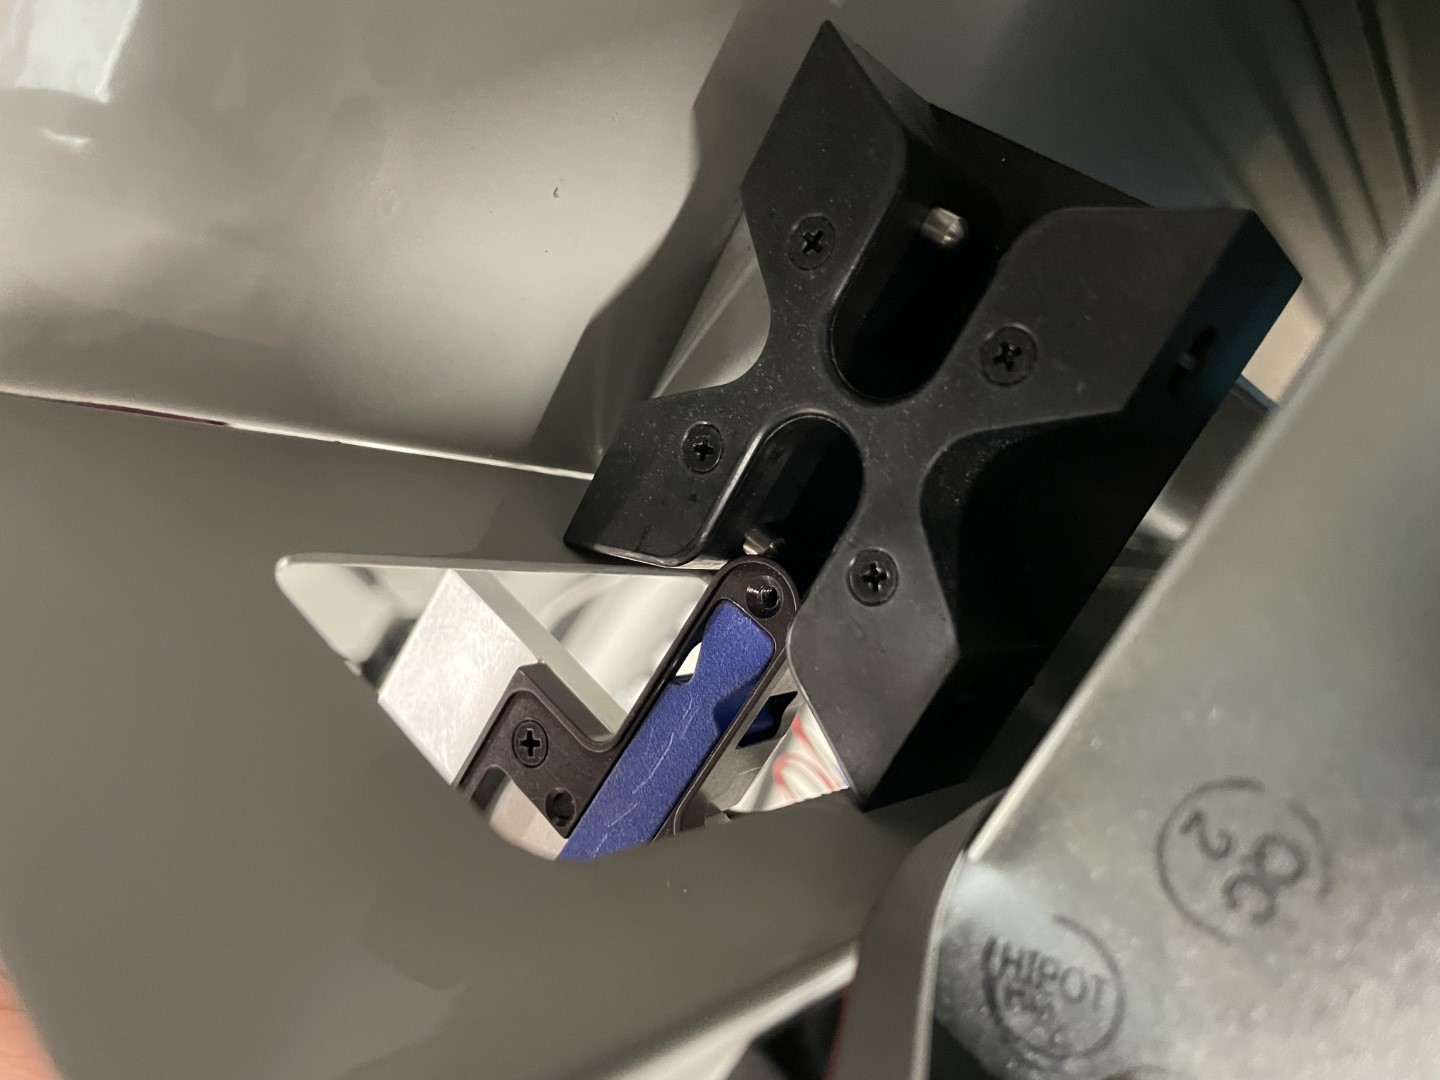
Figure 7: EPC TIM Cover (Screws Not Installed Yet)